Basic Skills
To use EasyEDA you need to be familiar with a few basic terms and concepts. The best way to learn them is to open up EasyEDA, and create a new schematic:
File > New > Schematic , and play!
Saving Your Work Locally
Although EasyEDA saves all your files on our Server, sometimes you may want to save your work locally and EasyEDA does provides a way to do this.
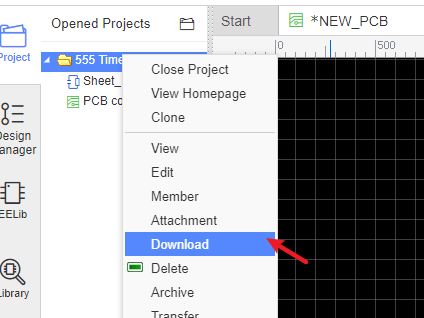
You can right-click your project folder, and click "Download Project", or export your design as EasyEDA source file via "File > EasyEDA Source".
To download your project:
History Record
It is easy to use this function, right click on the document for which you need the history as in the image below: After clicking on the history link, you will get a list of the History as in the image below. 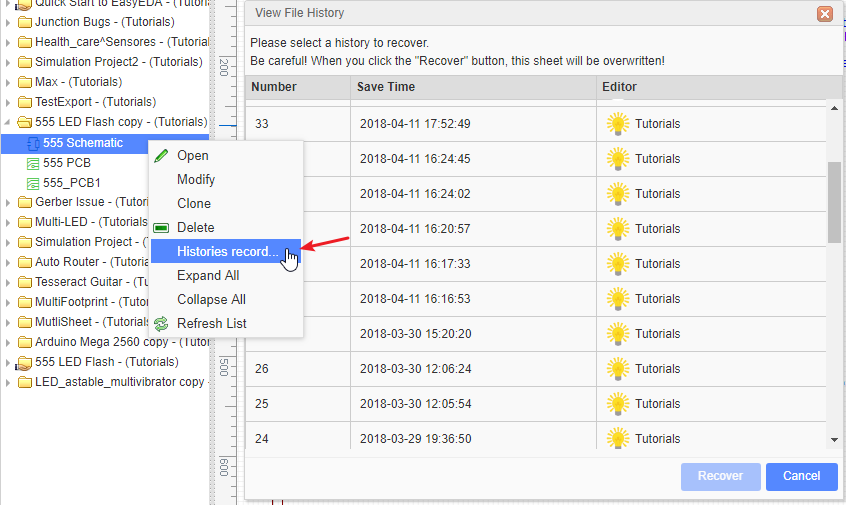
Click the History number to open the saved file in the editor, if this is what you need, you can save it to your project and delete your bad file.
Note: 1. For now, all the History entries are tagged with a number. An upcoming feature will allow you to add a custom tag.2. Saving your files too frequently will create many History entries and it will become more difficult to find the exact one you want.
Document Recovery
No operating system, software or network is perfect, so sometimes things go wrong. Having your Desktop or web browser freeze or your broadband connection drop, two hours into laying out a PCB, could spoil your day.
However, with EasyEDA, your day will be just fine.
This is because EasyEDA auto saves and makes backups of all your open files to your computer, crash recovery is built into EasyEDA.
On the top menu, click Menu - Advanced - Document Recovery as below:
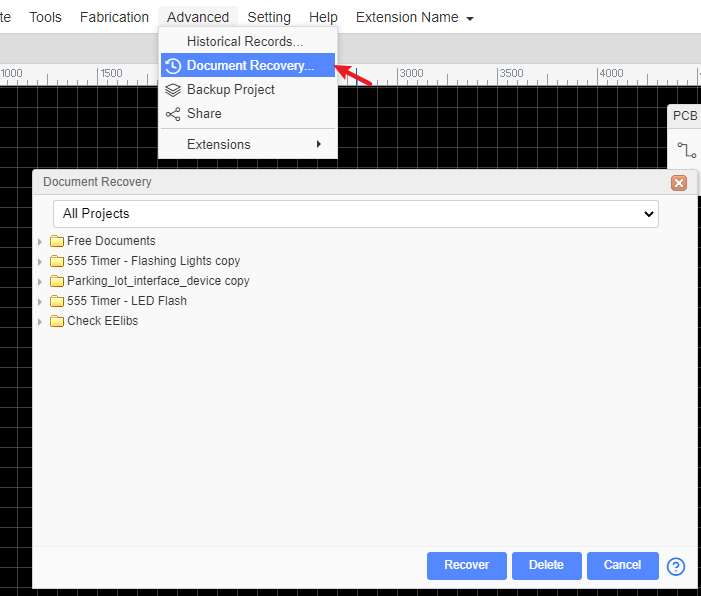
Expand the folder to the latest version, Select the file which you would like to recover, then click the Recover button; your file will be opened in a new tab, then save this opened file.
Please note:
- EasyEDA saves these crash recovery files on your computer and not on the EasyEDA server. Therefore you cannot recover files from a crash on one computer or browser by changing to a different computer or browser.
- If you cleaned your browser's cache, the recovery files will disappear.
- If you made a mistake deleting a file and removing the cache, you might be able to find your document in the recycle bin: https://easyeda.com/account/user/recycles/personal.
Resizing the canvas area
Hovering the mouse cursor over the areas indicated by the three green ellipses will bring up the blue sidebar toggle lines. Clicking on them will toggle the visibility of their associated right and left areas to expand the canvas area. The vertical lines can be dragged horizontally to resize the panels.
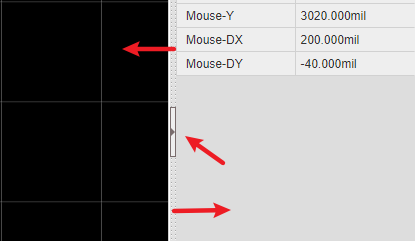
Cursor Style
Some users do not like the cross cursor, so you can change it to an arrow cursor like in the image below.
Via: Top Menu - View - Cross Cursor 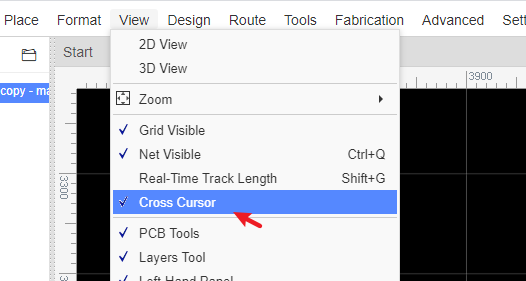
The difference between these options is shown below:

Clear and delete
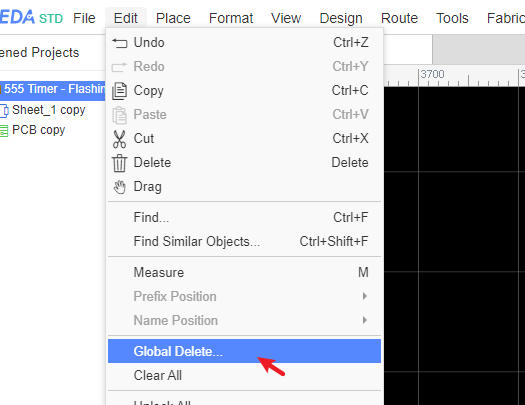
If you think your schematic or PCB looks terrible, and you want to redraw everything, you can do this:
- Top Menu > Edit > Global Delete.
- Delete this schematic and create a new one.
- Click one object or CTRL+A, press delete key to remove all objects.
Left clicking
Similar to other EDA software:
- Click on an item to select it;
- If over a selected item, click and hold to drag a selected item;
- If not over a selected item, clicking and holding while dragging creates a selection box;
- The selection box, using click and drag to the right, selects everything inside the box;
- The selection box, using click and drag to the left, selects everything inside and intersected by the box;
- Double click on a text area to edit the text;
- The exact left click functionality depends on what item is being selected and in what Canvas the item exists (Schematic or PCB).
Right clicking
In EasyEDA, right-clicking opens a context sensitive menu:
- When you are placing a symbol, right-clicking will stop placing and return to select mode. This is the same as the ESC key.
- When you are drawing a shape such as a polyline, after a right click, the polyline will be stopped at the place where you right click but the mouse will remain as a cross, so you can draw another shape.
- To get out of the current active context sensitive command such as placement or drawing mode and go back to select mode, just double right click or press ESC (sometimes twice).
Right-Click and drag Right-clicking and holding the button anywhere in the Schematic, Waveform or PCB Canvas while dragging the mouse will move the canvas around within the EasyEDA window. Holding the middle button and dragging performs the same operation.
ESC key
Pressing the ESC key ends the current drawing action but does not exit the current active context sensitive command mode (i.e. it does not return the cursor to select mode). Pressing ESC again returns to select mode.
Select more shapes
- CTRL+Left Clicking on items adds those items to your selection;
- Clicking and holding creates a selection box;
- Creating a selection box, using click and drag to the right, selects everything inside the box;
- Creating a selection box, using click and drag to the left, selects everything inside and intersected by the box;
Zoom in and Zoom out
- Using the middle mouse button:
- Roll forward to zoom in;
- Roll back to zoom out;
- Using hotkeys, the default hotkey
Afor zoom in,Zfor zoom out.
Please note: Do not scroll your mouse at the same time as pressing the CTRL key when your cursor on the top menu, the browsers will zoom the whole website, if you just want to zoom the canvas in the EasyEDA window, you need to put your cursor onto the canvas. If the “zoom the whole website” happens, just press Ctrl+0 to reset the browser view zoom.
Double clicks
Double clicking any text area opens a resizable text box that allows you to edit the text.
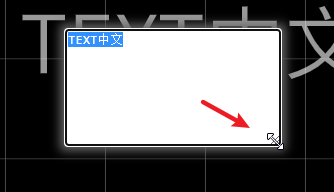
Press the enter key to save your changes. Click outside the box or press ESC to discard your changes.
Pan/Move Canvas
- Right click anywhere in the Schematic, WaveForm or PCB Canvas and Hold down right button to drags the canvas around within the EasyEDA window.
- If your canvas is bigger than the EasyEDA window and is showing scroll bars, you can use either the scroll bars or the Arrow keys to scroll the canvas to pan.
- When drawing a wire, a graphic line or shape that you wish to extend beyond the edge of the EasyEDA window holding down the left mouse button after starting the line will pan the canvas to keep the drawn item inside the window.
Tip: If you use Chrome, and cursor is in the canvas while pressing CTRL or ALT key and rolling your mouse, the canvas will move vertically, and when pressing SHIFT and rolling your mouse, the canvas will move horizontally.
Rotate
After selecting one or more items, you can rotate the selected items using:
Top Menu > Format > Rotate or by pressing the default rotate hotkey: ‘Space’.
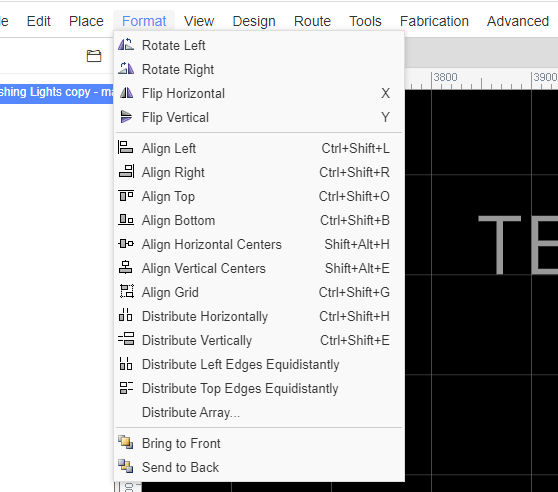
When in PCB view mode you can click the footprint and change its rotation in the right property panel.
Please note: Rotating a multiple selection rotates each item about its own symbol origin. It does not rotate the items about the centroid of the group of items.
Flip
To place a Q2 as shown in the schematic below you need to Flip the item. Via: Top menu - Format - Flip.
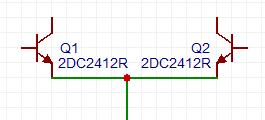
You can Flip one or more selected items using:
Rotate and Flip > Flip Horizontal or Flip Vertical from the toolbar,
or by pressing the default flip hotkeys: X to Flip Horizontal, Y to Flip Vertical.
Notice: Footprint does not support the flip command.
Align
EasyEDA provides many align option features, you can align your symbols or footprints very easily using: Top menu - Format - Align. There are also icons on the toolbar for this.

Bring to Front and Send to Back
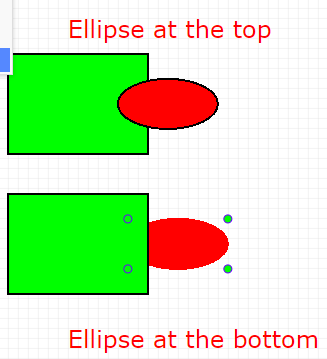
In the image below, both the rectangle and the ellipse are filled. Use: Top menu - Format - Bring/Send to Front/Back.
If you draw an ellipse before drawing a rectangle, the rectangle will overlap and therefore hide the ellipse. To reveal the ellipse, select the rectangle and then use the Bring and Send function, as shown:
Multiple Windows
Since v6.4.0, EasyEDA supports multiple windows design.
How do it works?
Open schematic and PCB
Right-click the schematic or PCB tab, click "Open in New Window"
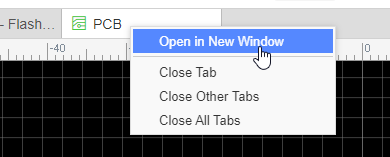
This will open the document in a new window, then you can do the cross probe: Click the component, pads, click the Design Manager list, the "Cross Probe and Place" also works.
Documents Tab Switch
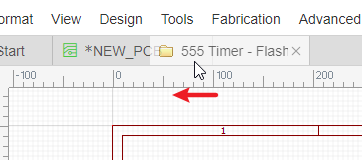
It is easy to modify the tab positions of your documents.
Simply drag the tab location, or use the hotkeys SHIFT+1 and SHIFT+2
